Flavor Boulevard

We Asians like to talk food.
Subscribe

Archive for the ‘RECIPES’

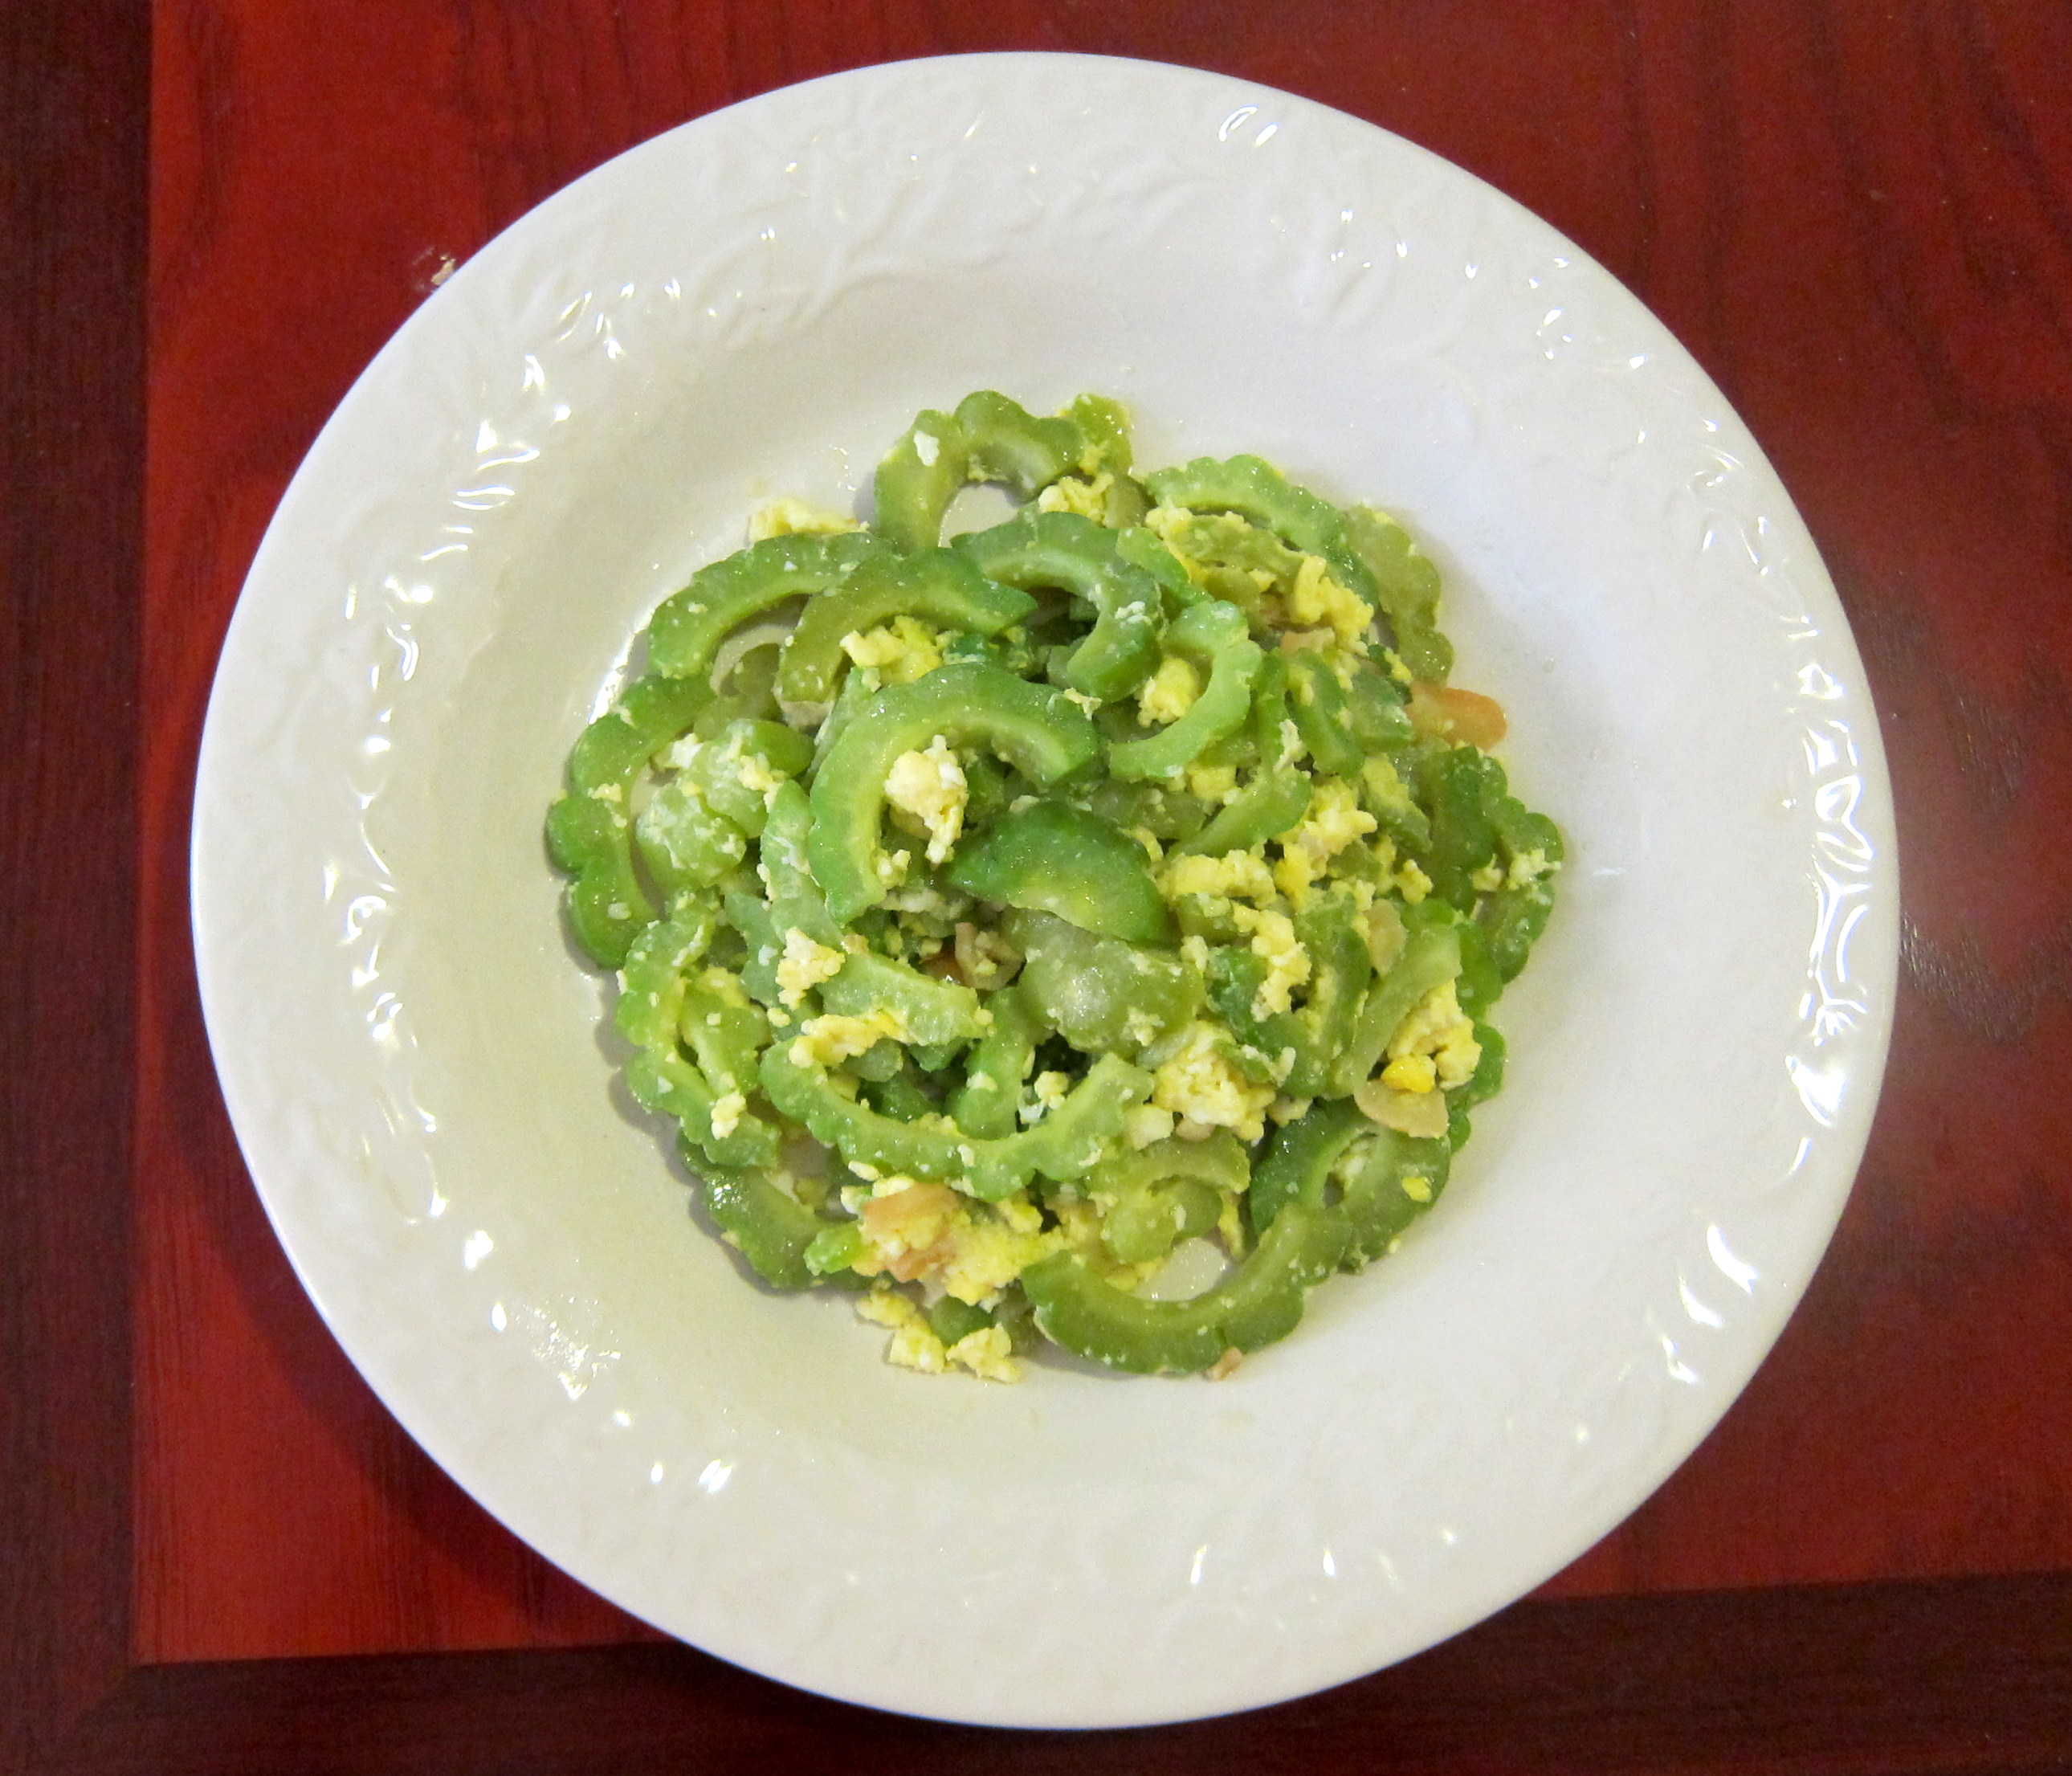
Recipe: Stir-fried bitter melon and egg (kho qua xao trung)

May 25, 2015 By: Mai Truong Category: RECIPES, Vietnamese

stirfried-bittermelon
Bitter melon is another thing that you either love or hate. Among my friends and relatives who have tried bitter melon, 42 percent(*) find it too bitter to try a second time. My mom is a special case. She used to shun it, then little me got a bad fever and had to eat it to help lowering my temperature (bitter melon has medicinal effects), mom was so worried that I wouldn’t eat it (like every toddler, I didn’t like food), but I chowed it down at first try, mom got curious, tried and started liking it too. That’s the story she told me, but I think she started liking it because she started making it, and everything she makes tastes great.

East-Asian-bittermelon
Even in the Bay Area, bitter melon is somewhat rare and expensive. The only restaurant I know of that has bitter melon is China Village on Solano, and a plate costs 10.95 with 70% egg and 30% bitter melon. Sushi California used to have it as an Okinawan specialty but had to cut it due to low demand. 🙁 Chinese and Vietnamese markets have them, but they can be far. Thankfully, today Berkeley Bowl has a small box of maybe 40 counts, so I grabbed a few.

Stir-fried bitter melon with eggs (in Vietnamese: Khổ qua xào trứng)

INGREDIENTS (8 servings):
– 5 bitter melons (less green ones with fat stripes, i.e., the East Asian variety, are much less bitter than the skinny ridged subcontinent counterpart)
– 5 eggs (or however many you like)
– 12 cloves of garlic (I just happen to like garlic a lot)
– Salt
– 1/3 cups of olive oil

PREPARATION:
– Wash the bitter melons, cut off both ends of each fruit.
– Cut each fruit length-wise in half.

ripe-and-unripe-bittermelon
– Use a spoon to scoop out the seeds (along with the fluffy white part). Redder seeds mean riper and less bitter melons. The red film outside the seeds are edible (I’ve eaten them while prepping the melons), but their mildly sweet taste is not much to talk to about.
– Slice each half into crescents of ~ 3-4 mm (1/8 inch) thick

soaked-bittermelon
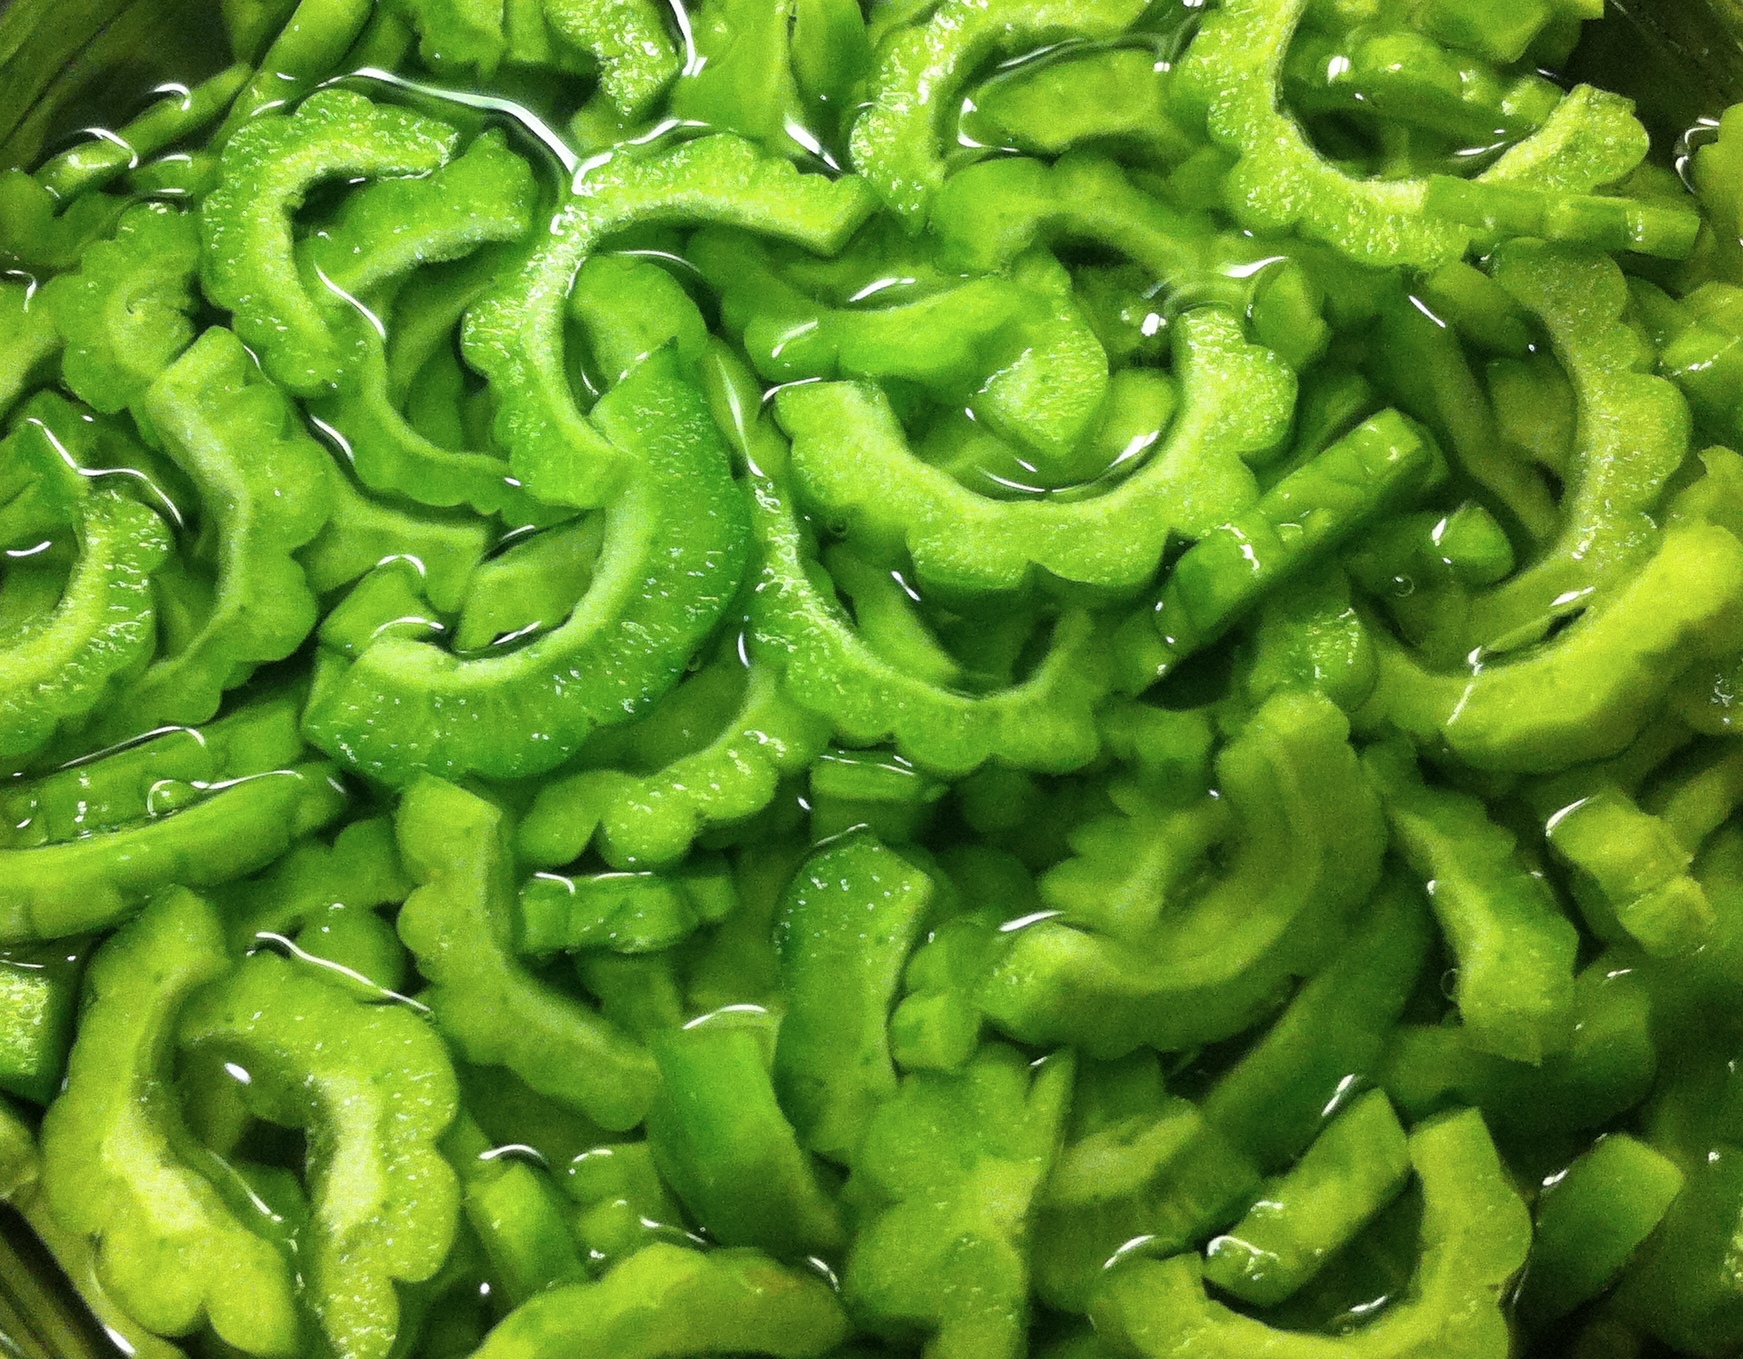
– Soak the slices in water (with a bit of salt) for ~ 30 minutes to partially remove the bitterness.
– Peel and slice garlic, set aside.

COOKING:
– Put oil in a skillet, medium heat, wait for oil to get hot and throw in the garlic to brown.
– Drain and add the bitter melon into the skillet.
– Lightly mix so that the melon slices at the bottom don’t just sit in oil while the top ones hang out.
– Cover and cook for ~ 5 minutes.
– Uncover, stir.
– Add 5 eggs as you would make scramble eggs.
– Scramble the eggs with the melons until the eggs are fully cooked.
– Sprinkle salt to taste.

bittermelon-with-pizza
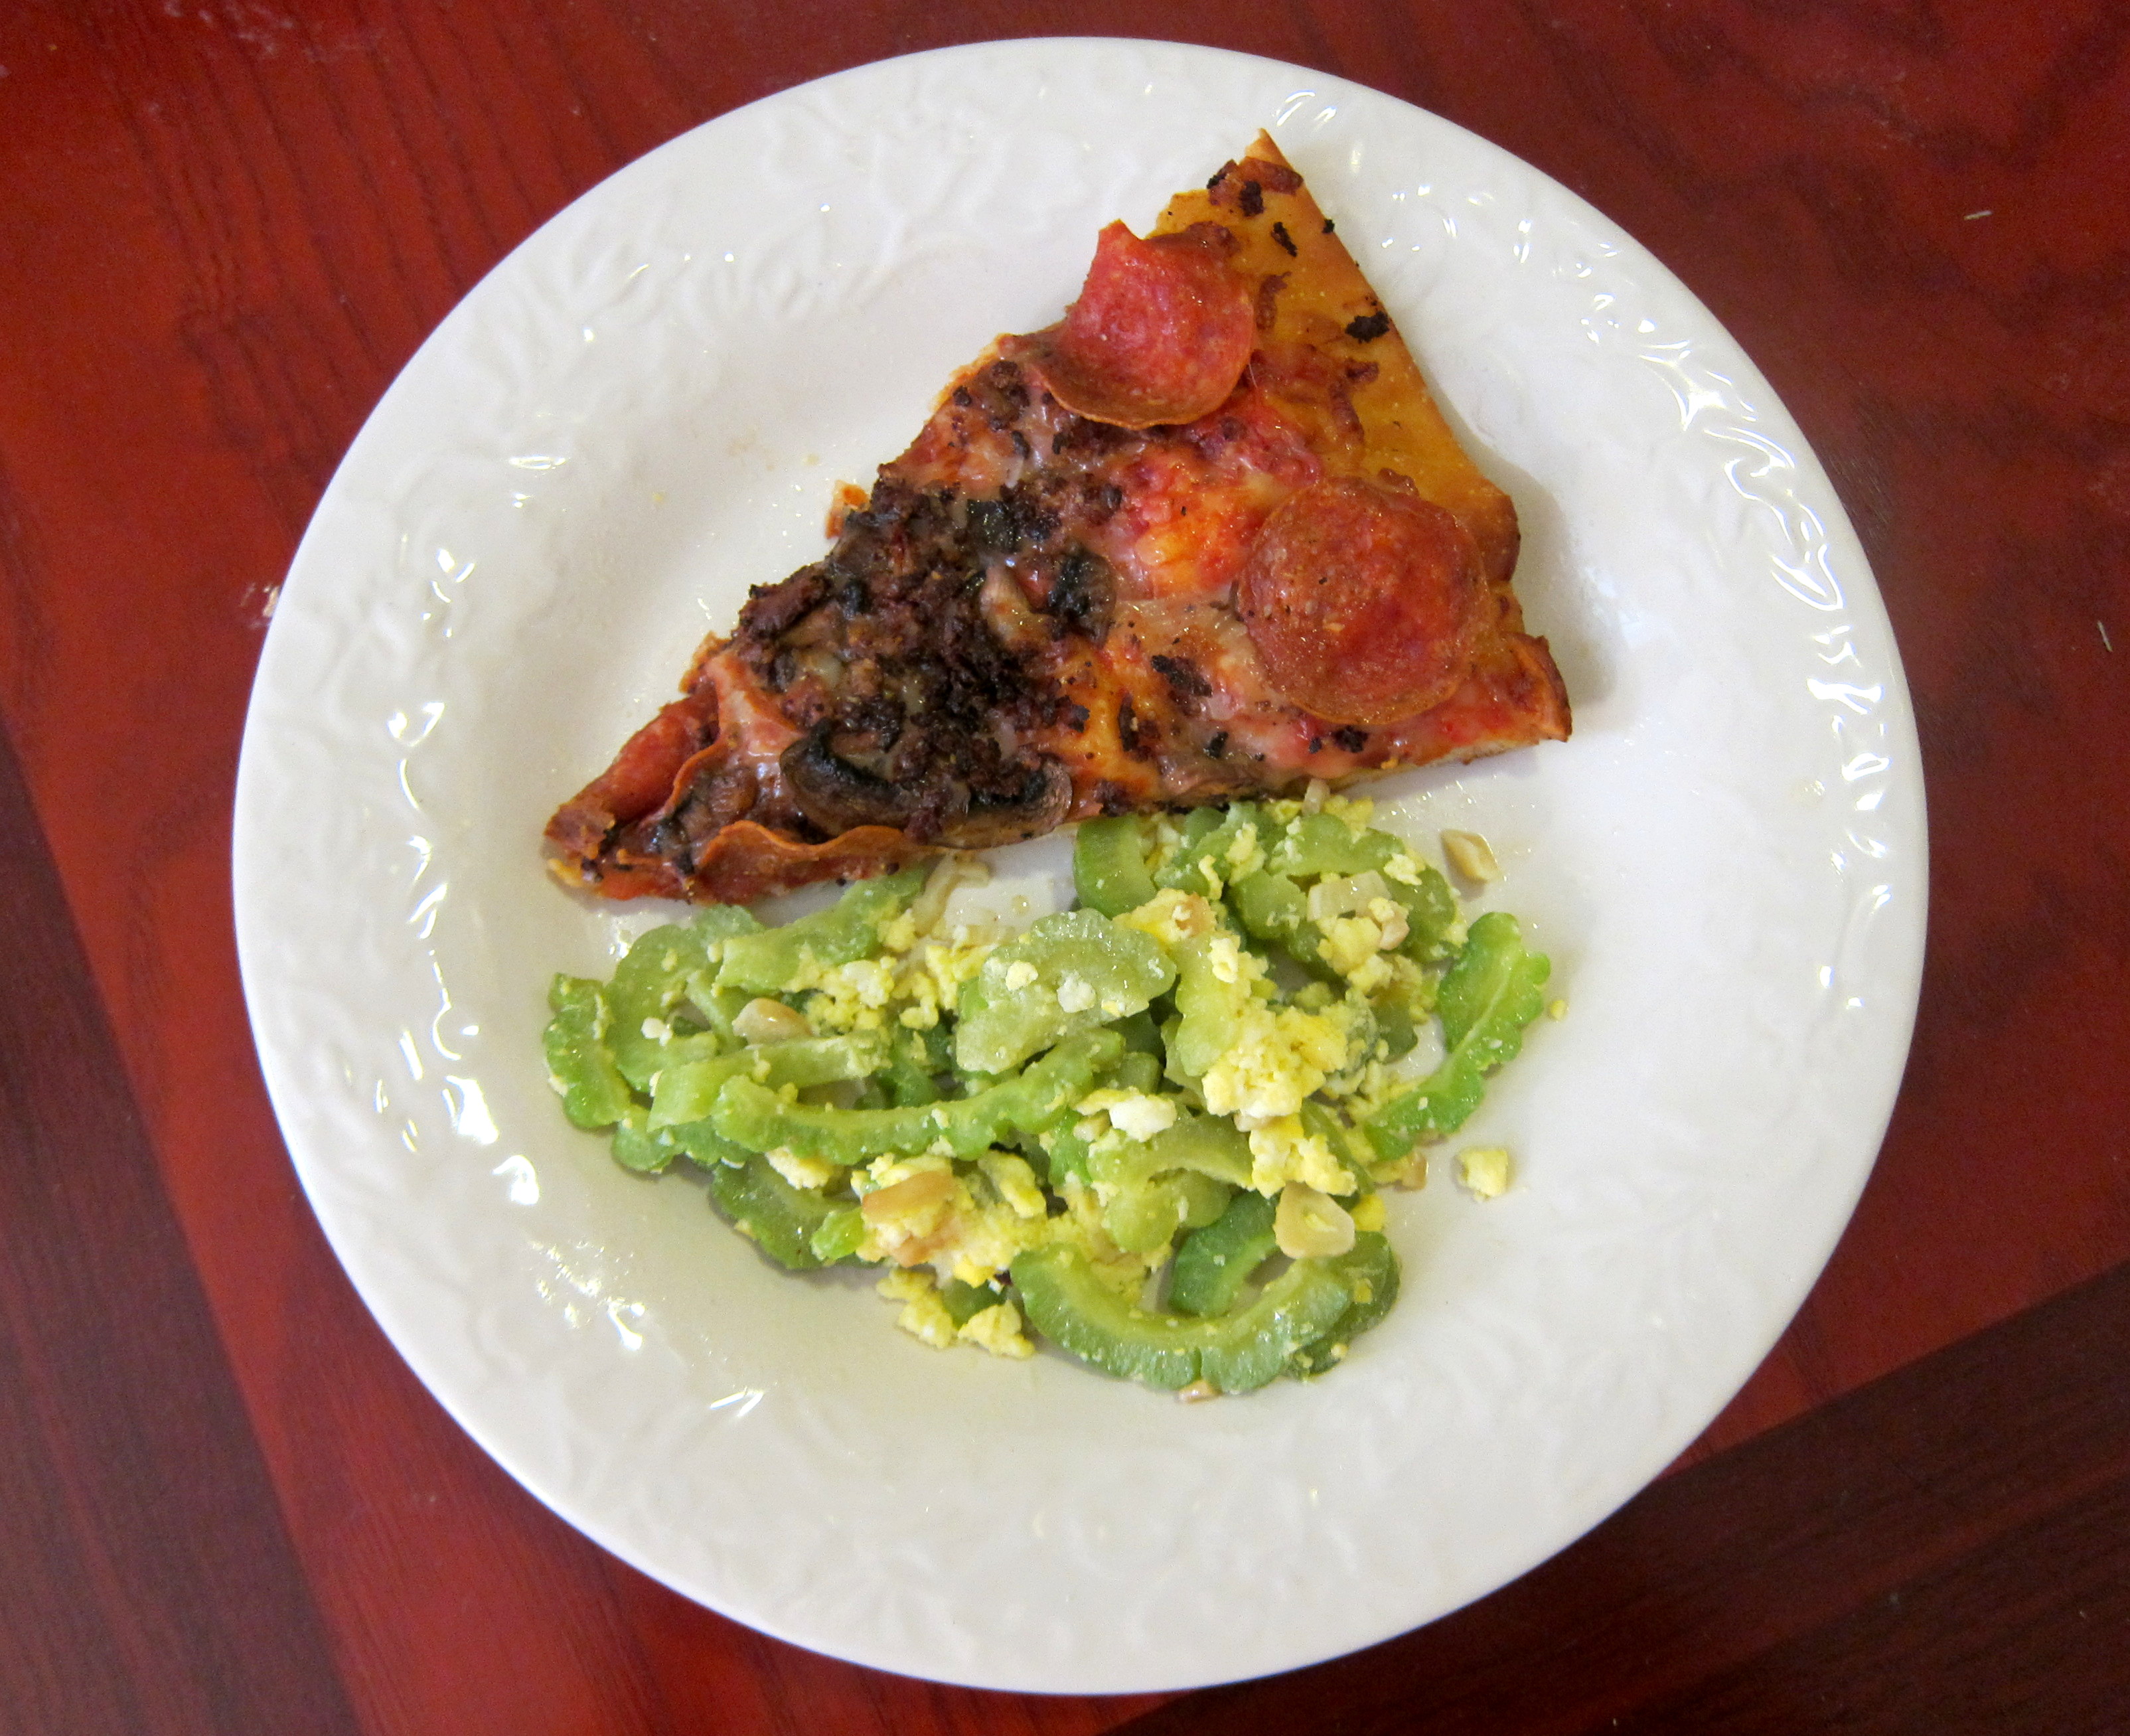
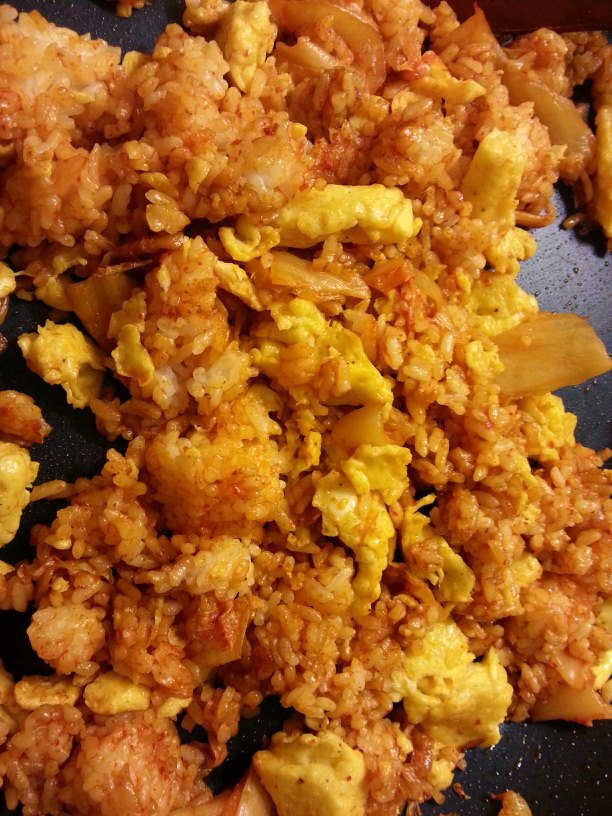
For colors, add pizza. 😉

Foodnote:
(*) This is not a fabricated statistics. I counted 12 people (excluding me) who have tried it and given me confirmed opinions on bitter melon. Five of them grimaced when the word was mentioned. If you’ve tried it and decided to be on either side, let me know so I can update my statistics.
(**) Total cost: bitter melons: 2.06 lb x $2.59/lb = $5.34; box of 12 cage-free large eggs: $3.19; prep time + waiting time: 40 minutes; cook time: 10 minutes; cleaning time: 10 minutes.

one shot: homemade hu tiu

January 08, 2014 By: Mai Truong Category: Comfort food, noodle soup, One shot, RECIPES, Southern Vietnamese

hu-tiu-bot-loc
From Mom: hủ tíu bột lọc.

Hu tiu is a common type of rice noodle in Southern Vietnam, often served in noodle-soup form, the noodle soup dish is of course also called “hu tiu“. The usual hu tiu noodle is characterized by its thin shape and chewy texture. Vietnamese love chewy noodles just as much if not more than any other country, so people began using various methods to make hu tiu (*) chewier (the soaking time before grinding, the grinding, washing the rice flour, the mixing ratio with water and other types of starch, the thickness to spread the mixture into a film, the temperature and time to steam it). Bánh bột lọc(**), a type of savory snack, is made with tapioca starch (cassava flour), so I guess hủ tíu bột lọc also contains tapioca starch.

I spent an hour googling but expectedly found little and contradicting information about hu tiu bot loc – nobody in the business would reveal their secret. What I found online is hu tiu bot loc originated from Cần Thơ, and what I found in my bowl are fat (and flat) strings, whose color is clearer and texture is chewier than both the normal (and thin) hu tiu and hu tiu dai (“chewy hu tiu”).

Mom’s hu tiu bot loc: (good luck getting a more detailed recipe than this one from Vietnamese moms!)
– boil dry hu tiu (sold at stores), immediately wash in cold water to preserve chewiness and prevent them from sticking together, set aside
– simmer pork bones to make broth, add salt to taste
– eventually, add pork, beef balls and eggs
– finally, add hu tiu and cilantro

Foodnote:
(*) – That link is written in Vietnamese but the pictures are instructive enough to get an idea of the hu-tiu making process.
(**) – What does “bột lọc” mean? Literally, “bột” is flour, and “lọc” is to distill, so “bột lọc” means “clear flour”.

Non-baked avocado pie with nut crust

November 29, 2013 By: Mai Truong Category: Fruits, RECIPES, sweet snacks and desserts

Avocado pie with gyokuro.

Avocado pie with gyokuro.

Thanksgiving. Gatherings. I was asked, “can you make dessert?” “Sure, I can make dessert.”

Yeah right. Five seconds later, “OH EM GEE. WhatcanImake!” It’s a Western party with Western people. I had never made a Western dessert before, not even chocolate chip cookies from dough that comes out of a tub (and then you just shape it into cookies and bake them, or not – one of the weirdest things about American people is that they love eating raw cookie dough like the Vietnamese like noodle soups. I don’t get it). So of course I did the same thing I do everyday at work – and also what I tell my students to do when they ask me homework questions: I googled.

The credit should go first to Cheryl. She once told me that a pastry chef at her previous job made an awesome avocado pie. Pie is common at Thanksgiving, and avocado is not too sweet and still around (the very tail end of the season, though), I figured at least I would like it.

Some part of me was wishing I could make a savory dish instead, one that I could taste and see the final product. (With pies, you can taste the components before you assemble them together, and then it’s in the hands of Fate.) The nice thing about dessert, though, is that I can make it the day before, and if I fall flat on my face, I’d still have a day to do it again. Thinking so at least helped me regain my composure to make it work.

Everyone at the party was quizzical about the green thing. I told everyone to try it to figure out what made it green (mainly I just wanted my pie to be eaten). A few people just went through a list of green things they could think of, including artificial colorings. It was fun. 😀 (And yes, they liked it too. 😉 )

Non-Baked Avocado Pie with Nut Crust
[to fill a 9-inch pie pan]

1. Brazil nut and date crust: (inspired by this Veggie Blackboard recipe)

  • 35 Brazil nuts
  • a handful of dried tart cherries
  • 45 pitted dates (it doesn’t have to be Medjool dates, I used Deglet dates, which is far cheaper per pound)

In a blender/food processor, grind the nuts into crumbs, blend in the dates and cherries until it becomes a sticky crumbly bunch. [You can substitute the dates with pitted prunes and cherries with raisins, dried blueberries, etc. or nothing. Basically, you need nuts and dried fruits.] Press the “dough” into the foil pie pan to shape the crust. Refrigerate while making the filling.

2. Filling: (inspired by this Kirbie’s Cravings recipe and one of the comments to that post)

  • 2 large Hass avocados
  • 2 lemons – to make 1/3 cup lemon juice
  • 1/2 can sweetened condensed milk

Blend them together into a smooth, thick paste. The lemon juice keeps the paste from discoloring (it stays green forever!). The avocado makes it luscious and not too sweet.
Fill the crust. Cover and refrigerate until serve.

Why I Love Fried Rice

November 03, 2013 By: Kristen Category: Comfort food, Korean, RECIPES

Yangzhou fried rice, kimchi fried rice, chicken and salt cod fried rice, whatever-that’s-in-your-refrigerator fried rice…I love it all. Fried rice is the ultimate comfort food – it’s filling, healthy-ish (if you put in a lot of vegetables), and just hits the spot every time. Perhaps the best thing about fried rice is how easy it is to make at home!

As someone who is still really learning how to cook, trying out a new recipe usually means that I’ll be spending anywhere from 30min – 2 hours in the kitchen (actually sometimes it takes me 30min just to prep everything because of my lack of knife skills). So for me, when I want a quick meal because I need to get back to reading or studying, or just because I don’t feel like devoting that much time to cooking, my go-to is always making fried rice. It usually takes me 15-20 minutes to cook fried rice at the most and while it probably is not the healthiest meal to eat every day, I usually end up making some kind of stir fry or fried rice at least 3-4 times a week because of how easy it is. Also, since fried rice is by nature something that requires the usage of pantry ingredients, I never have to worry about buying fancy ingredients.

1004545_10151924810260733_669571591_n

Here’s my very simple kimchi and spam fried rice recipe! It’s spicy, sweet, and salty and takes about 20 minutes altogether to make from prep to cooking (and probably 10 minutes for washing up afterwards or less if you eat straight from the pan, which I do sometimes when I’m lazy).

Spam and Kimchi Fried Rice Recipe – serves 2

I’ve made this recipe countless times and I’ve gotten to the point where I can probably do it in my sleep. I don’t have a source for this recipe since I’ve based the taste off of the kimchi fried rice from Kimchi Garden and then the more I made it the more I changed it to suit my taste. I tend to not follow recipes very well and work mostly from look and taste, so my measurements may not be entirely accurate and may not suit everyone’s taste, so some adjusting may be needed depending on how spicy, sweet, sesame oily, kimchi-y, etc. tasting you want it.

Ingredients:

  • Rice: 1 cup (My rice cooker makes 2 cups and I usually take half of that for 2 people. Also, I tend to use fresh rice more than refrigerated rice and never really noticed that much of a difference, but maybe it’s because I prefer my fried rice to still be a little sticky.)
  • Kimchi: About 2 cups roughly chopped kimchi or enough to suit your taste.
  • Spam: 1/3 of a block of Spam, diced
  • 2 teaspoons toasted (or regular) sesame oil (1 for initial stir-frying, 1 for finishing)
  • 1 teaspoon brown sugar or regular sugar (use less or more depending how much kimchi you use)
  • 1 tablespoon gochujang (more or less depending on how spicy you like it – 1 tablespoon makes for a *pretty* spicy fried rice)
  • 2 eggs
  • 1 teaspoon olive oil (or any kind of oil, including sesame) for the eggs

Instructions:

  1. Heat up 1 teaspoon of sesame oil over medium high in a relatively large frying pan or wok. I always prefer woks instead of pans because when I flip over the rice with my spatula, it doesn’t fall over the sides.
  2. When oil starts to crackle a little, put 2 cups of kimchi and diced Spam into wok. Stir-fry, making sure that nothing is burning (adjust heat if necessary to medium).
  3. When the kimchi begins to release some liquid and starts turning a little translucent, add in a teaspoon of brown sugar. A caramel-y thick sauce should start forming with the kimchi liquid. Stir-fry a bit longer (about 3-5 min) until Spam starts browning a bit.
  4. When the kimchi and Spam look like they’re cooked enough to eat on its own, add the rice in. Break  up clumps of rice with spatula and mix thoroughly. Leave some of the rice at the button to get it a little burned or crispy if you like it (it’s my favorite!). If not, keep on stirring!
  5. Add in tablespoon of gochujang and mix thoroughly so that it distributes evenly. It’s a thick sauce so it may take quite a bit of stirring before it’s fully incorporated. (Usually this process from when you add the rice to fully incorporating the gochujang takes about 5-7 min.)
  6. The mixture will probably be looking a little dry, so add another teaspoon of sesame oil and mix thoroughly. Set burner to “warm” or remove from heat.
  7. In another pan, add a teaspoon of sesame oil or regular olive oil. Crack 1 or 2 eggs and cook like you would normally to whatever level of doneness you prefer. (I make sunny-side-up fried eggs by cooking for about ~2 minutes on medium high heat and then ~2-3 minutes on medium low with a lid.)
  8. Place egg on top of fried rice and you’re ready to eat!
581935_10151498636045733_927445069_n

Kimchi fried rice is the best~

More Peach? Make Peach Sauce.

August 06, 2012 By: Mai Truong Category: American, Fruits, RECIPES, Vegan

[…] now the hand is coming back. And I think that has a lot to do with food. Farming is gonna be hip again and people are going to think about the things they’re contributing to society.
[…] Hopefully what this is leading to is people learning to shop like all good chefs do: We go and get all the best [stuff] and come home and figure out what we’re gonna make. Italy became cool in the gastronomic world in the ’70s because people went there and the what-the-[stuff] moments or the holy-[stuff] moments were never based on truffles or super-intense technique. It was more like, “God, this is spaghetti and zucchini, and it’s this good?” It was because there was no noise in it. It was spaghetti and garlic and zucchini in season.

– Mario Batali, Batali Beat, Lucky Peach Issue 3, 2012 –

No doubt Lucky Peach is not big on sensoring rough language (I’m old fashioned, so I bleeped them out myself), but the point is with all these new cooking shows, chefs have attained celebrity status (Now the Bay Area has its own cooking show: The Big Dish), and for a really brief moment, I had thought about becoming a chef. On the way to Teance I see this culinary school, and as if I hadn’t had enough on my plate already, I memorized the name and Googled it when I got home. I seriously thought about taking a class. Thank goodness it costs a little more than I expected.

Cooking school is not the best route to chef-dom, though, because “not a single chef I interviewed said that culinary school made any difference in either hiring decisions or an individual employee’s success,” said Mark Wilson (Should You Go to Culinary School? (Maybe, But Probably Not)).

As one chef put it, and I can’t remember who(!), it goes something like this: “if you want to be a chef, you got to ask yourself: do you truly love washing dishes?

I don’t.

So that’s that. Now I choose the easy route: I’m a chef in my own kitchen, and to follow the trend, I’ll attempt to cook with the season. How do I know what’s in season? I go to the grocery store and see what’s most abundant (not necessarily what’s cheapest, because the out-of-season may look so sad that they’re on ridic sale). For now, it’s peach.


Basic Peach Sauce (adapted from Mario Batali’s Basic Tomato Sauce)
(make 2 cups)

– 3 peaches (let it ripe until it’s a little mushy), peeled, pitted and mashed by hand
– 4 plums, peeled, pitted and mashed by hand
– 1 onion, diced
– 4 cloves of garlic, thinly sliced
– 1/4 cup olive oil
– 2 tbs chopped fresh thyme leaves (I use lemon thyme, it makes the whole room aromatic!), or 1 tbs dried thyme
– salt

In a 3-qt saucepan, heat the olive oil over medium heat, add garlic and onion, saute until soft and slightly brown. Add thyme.
Add peach and plum, bring it to a boil. Simmer for about 30 minutes, stir often (the peach likes to stick to the bottom). Season with salt and serve. (I use it with sweet potato gnocchi)
According to Batali: “this sauce holds for 1 week in the fridge or up to 6 months in the freezer“.

This is my third and last session with peach this season, the first two are Peach Mul Naengmyeon and Bouquet Peach Gyoza.

Tags: , ,

For the Summer: Gyoza with Fruits and Flowers

August 03, 2012 By: Mai Truong Category: Fruits, RECIPES, savory snacks, Vegan, Vietnamese


What can you do with 24 squash blossoms?

Twenty-four is too few for squash blossom canh, a clear soup that Mom used to make when I was little. The flower is the only thing of a pumpkin plant (squash blossom in Vietnam is pumpkin blossom) that I didn’t mind eating (I hate pumpkin). The flowers perish too quickly that American grocery stores almost never carry them(*). That scarcity, I can only guess, also raises them to the exotic level that makes the modern American restaurants include the word in their menu around this time of the year (summer squash blossom season) and feature a mere 3-5 flowers on a plate amidst the more common vegetables like zucchini and cauliflower. The craze has been around for at least a decade, Carolyn Jung said, and I don’t see it wilt away anytime soon.

Although I dislike the place at first because it’s always too crowded, Berkeley Bowl gradually grew on me. It started when I realized, after many years away from Vietnam and living just a bit inconveniently far from the Asian markets, that I haven’t seen certain grocery items for ever, for example, woodear mushroom (nấm mộc nhĩ) and straw mushroom (nấm rơm). Then one day I ran into them at Berkeley Bowl. I was like, oh? they have that here?! It’s a great moment. One where you reunite with old friends, and if we should speak in grand terms, it reminds me to appreciate growing up in Vietnam and in my family, the lack of either component would have resulted in a much, much poorer experience with food.

Sometimes that great feeling clouds my better judgment. You know, when people dig out a picture of their middle school gang from a notebook, buck teeth and silly hair or whatever, they feel compelled to put it on Facebook. When I saw the squash blossoms at Berkeley Bowl, I felt compelled to get them home. Not that I knew what to do with them or had time to cook them.


Mom suggested stuffing them with ground pork. I’ve had them stuffed with cheese and batter-fried. But it’s summer. Peaches are in season. This something I make with squash blossoms should taste light and fresh like the flowers it bears.

Bouquet Nectarine Gyoza
– Squash blossoms (the male blossoms, because they’re big enough to stuff)
– medium firm white tofu
– gyoza skin (wrappers)
– 1 yellow nectarine, diced (If you use peach, peel off the skin because peach has fuzz)
– sugar, salt, pepper to taste
– a steamer

Rinse the squash blossoms under cold water, peel off the dark green spikes at the base. Also break off the stem, if there’s any.
Mash the tofu by hand while mixing it with the diced nectarine. Add salt, sugar and pepper to taste.
Gently stuff the nectarine-tofu mix into the squash blossom.
Wrap a gyoza skin outside the blossom, leaving at least the top half of the petals exposed.
Steam until the gyoza skin turns translucent (5-10 minutes). The flower petals will wilt but still retain their color and the bottom half should still be a tad crunchy.
Take out and let cool.

UPDATE: pan-fried these to make them taste better (albeit less healthy  :-D)


(*) Every website I’ve looked claims that squash blossoms can only stay fresh in the fridge up to 2 days under precise condition. Well, what you see in the picture “pre-steamed gyoza” are squash blossoms after 8 days in the fridge.

Ten-minute noodle and nectarine

August 01, 2012 By: Mai Truong Category: Korean, noodle soup, RECIPES


It’s summer. Time for cold noodle. Refrigerated, ice-cold noodle. And all it takes is 10 minutes (that includes water-boiling time).

Traditionally, the Koreans sweeten mul naeng myeon (물 냉면, “water cold noodle”) with sliced Asian pear and julienned cucumber. Asian pears are not yet in season (I don’t really know when its season is, but the tiny ones at Berkeley Bowl look too sad to slice), and when I want to cook my naeng myeon, like always, I never have what the recipe calls for, even if it’s just cucumber. So I did what everyone would.

I ignored the recipe.


I used nectarine in place of pear and pickled cucumber (shiba zuke) for fresh cucumber. Works out great. Nectarine is sweeter than pear. 🙂


Almost-instant Korean Cold Noodle with Nectarine (make 1 serving)

– 1 bag of mul naeng myeon (물 냉면) (can be found at your local Korean market). This thing contains 2 packets of buckwheat noodle, 2 packets of cold broth, 2 packets of mustard seed, 2 packets of pepper paste (in case you just want naeng myeon without mul (water)). Just take 1 of each.
– 1/4 slightly unripe nectarine, sliced
– a few pieces of pickled cucumber (shiba zuke)
– water
– a pot

Boil water. Cook the noodle in 1 minute, then drain under running cold water. Let cool. Slice the nectarine.
In a bowl, place the noodle, top it with pickled cucumber and nectarine. Pour the chilled broth. Add the mustard seed if you like. Put the bowl back into the fridge to make it colder.
Quench your thirst.

Rice Paper Kimchi Roll – a cross between ssam bab and fresh spring roll

July 29, 2012 By: Mai Truong Category: Comfort food, Korean, RECIPES, Vietnamese

How can you bring kimchi to lunch at work without the smell of fermented cabbage?

I like the garlic smell of my homemade kimchi, but I’m not sure if I want my office to smell like it. Besides, I’m not a fan of bringing multiple containers to work. I don’t even want people to see me with a fork at my desk, and it’s even worse with an empty but dirty container. The ideal lunch is some kind of finger food, preferably balanced.

One afternoon, I decided to make ssam bab, a kind of roll with napa cabbage kimchi outside and stir-fried rice inside that I first saw in Kimchi Family and never in real life. You can find kimbab (rice roll in kim – seaweed) for very reasonable price in the Asian Ghetto just south of campus, but no Korean restaurants in the Bay dish out ssam bab. The only problem: I cut the napa cabbage leaves in half when I made kimchi, so now the leaves are not big enough to wrap up the rice, and things fall apart. Well, if I can’t make it the Korean way, I’m making it the Vietnamese way.

I use rice paper to wrap the ssam bab. The result: a cross between ssam bab and fresh spring roll. The perfect triple-layer balance: rice-kimchi-rice. The rice paper blocks the kimchi smell from diffusing across the room, keeps the roll intact thanks to its elasticity, and makes a clean, grease-less, non-sticky wrapper. The kimchi gives the roll a sour, spicy, garlicky edge so we don’t need a dipping sauce. Texture-wise, a bite takes us from chewy rice paper to juicy but crisp kimchi to the soft rice mixed with crunchy fried anchovy. Three of these rolls fill me up, but I chomp another just because.

Korean ssam bab: sauté pork and kimchi, mix with hot steamed rice, roll in a leaf of pickled napa cabbage, tie the roll with a leaf of cooked green onion.

Rice Paper Kimchi Roll

(make 20 rolls)
– 1 clove garlic, thinly sliced and browned
– 6 eggs, scrambled with garlic, and salt and sugar to taste
– 2 cups rice, cooked
– 10 quail eggs, halved
– 20 sheets rice paper
– 1 cup fried anchovy (myeolchi bokkeum)
– 20 pieces napa cabbage kimchi, the best size is 1.5 inches x 3.5 inches

Mix the scrambled eggs with the cooked rice.
Wet a sheet of rice paper in warm water until it’s soft, spread the rice paper on a plate or a chopping board.
On the rice paper, layer a piece of kimchi, some egg rice (about 1 tablespoon), a few row of fried anchovies, half a quail egg.
Fold the rice paper up along the kimchi piece to cover the filling, then fold the ends over.
Roll. The edge of the rice paper will stick naturally to the roll if the rice paper is moistened enough.

The rolls will stay good in the fridge for 4 days. Cover 3 rolls with a moist paper towel and microwave on high for 1 minute to regain freshness.

Recipe for bánh dầy đậu – Vietnamese mung bean mochi

July 23, 2012 By: Mai Truong Category: Northern Vietnamese, RECIPES, sticky rice concoctions, sweet snacks and desserts, Vegan


When I’m home, Little Mom pampers me with her food and sweeps me out of her kitchen, except when I open the fridge to snack, because her mind fixes on the idea that if she lets me touch the stove, I only make a mess. She’s right. Not to toot my own horn but when I’m home, I’m a lazy mess. So when I said Mom, let’s make bánh dầy đậu, she threw her hands up, said oh my sky there’s no more room in the fridge, made the bean paste herself, and only let me play with the dough. 😉

The mung bean paste filling is really the most important part of the Vietnamese mochi (similar to the Japanese mochi, but it’s 100% Vietnamese): you want it slightly savory, slightly sweet, and mashed. Little Mom is the queen of seasoning, so that part was flawless. My job was to knead the dough and roll up them balls. At least I didn’t have to pound steamed sticky rice into oblivion. I was kneading while watching TV with Mom. I was kneading when she sectioned her bánh bao dough into balls. I was still kneading when she wrapped the pork and egg inside the bánh bao dough. More kneading makes the mochi skin softer. After kneading, the rest was a breeze.


Bánh dầy đậu (pronounced kinda like |beng yay dou|) – Vietnamese mung bean mochi:

(Make 12 mochi)
– 250 g dried split mung bean (~ 2 cups), soaked overnight and deshelled
– 2 cup sticky rice flour
– 1 cup warm water
– 1 cup sliced mushroom
– salt and sugar to taste

The filling:
After soaking the mung bean overnight, wash away the green peel outside, we only want the yellow seed. Boil the mung bean until it’s tender. Mash the cooked bean.
Set aside 2 cup of mashed bean, let it dry and crumble to make mung bean powder.
Sautee mushroom, add the remaining mashed bean while sauteeing, add salt and sugar to taste. Let cool.
Make 12 small balls.

The mochi skin:
Pour water into the the rice flour while mixing with your hand. You should stop when the mix feels smooth but not liquidy. Add more water if the dough breaks.
Knead for at least 30 minutes.
Divide into 12 balls, flatten each into a small disk.

The complete mochi:
Put the mung bean ball into the middle of the skin, wrap it up, make sure that no bean leaks out. Drop the mochi in boiling water and cook until they float to the surface. Cook for another 2 minutes just to make sure.
Roll the still hot mochi balls in mung bean powder. Let them cool.

Enjoy with a cup of Buddha’s Hand oolong. 🙂

Alone in the Kitchen with an Onion

July 20, 2012 By: Mai Truong Category: Book, Opinions, RECIPES, Review of anything not restaurant


One of my onions grew a plump white sprout.

So plump that I couldn’t bring myself to throw it out. I left it alone for a week.

Then two weeks.

Then three weeks.

It kept getting taller and plumper. At some point the unthinkable thought of throwing it out became the unthinkable thought of letting it die. For a thing trying so hard to live on nothing, what kind of creature am I to thwart its life? So I placed it in a clean container that used to contain prunes, put in some soil leftover from another plant that I’ve long transfered the custody to my mom for its better chance of survival, and poured in water. I told my mom about it, but she said don’t have high hope. I wasn’t hoping for anything, I just wanted to give it what it wants: soil and water. I placed the pot outside during the day and took it in at night so that it doesn’t get cold. The sprout grew, turned green, and another leaf came out. Then I took a trip home for two weeks, thinking that the onion, having a watery body, should be okay without watering for two weeks.

When I came back, I saw the prettiest thing I’ve ever seen of an onion: several skinny green long stalks sprouting out, tall and cheerful. Thank you for surviving, Onion. You make the apartment alive.

I’m not complaining that I’m living alone. I chose this studio apartment instead of sharing because I was looking forward to living alone all my college years. My college roommates were nice people, I don’t dislike them. One girl was there for maybe 2 weeks total the entire year we shared the dorm room, I liked her. There are just songs I want to turn the volume up to for hours on end, meals I wanted to eat while watching a movie on the computer, times to laugh or cry without explaining to two quizzical and not necessarily empathetic eyes. Times to do crazy dance. Times to burn stuff in the microwave and send the alarm screaming. I was tired of asking for and giving explanations. The best thing about living alone is that you can do whatever you want.

The worst thing about living alone is that you can do whatever you want. The only thing I’ve cooked for myself since February is garlic scrambled egg and rice. I skip lunch everyday. I thought I was bad. But Ann Patchett stuck to her Saltine diet for months: “I ate slices of white cheese on Saltines with a dollop of salsa, then smoothly transitioned to Saltines spread with butter and jam for dessert. I would eat as many as were required to no longer be hungry and then I would stop. […] Day after day, month after month, I stuck to my routines like a chorus girl in the back row.” Actually, maybe her diet has more variations than mine. But you get the point. Dining alone means dining with the person who you want to hide and to expose to the world at the same time, the person that only you know.

That person takes many forms, and that person goes through many phases, some pleasant, some weird, most are captured in the collection Alone in the Kitchen with an Eggplant. The beans and cornbread phase (Jeremy Jackson), the asparagus phase (Phoebe Nobles), the chili phase (Dan Chaon), the instant noodle phase (Rattawut Lapcharoensap) (I’ve gone through this phase my self – Sapporo Ichiban, original flavor – until Berkeley Bowl rearranged their aisles and I couldn’t find the packages for weeks, I contemplated boycotting Berkeley Bowl). There’s eating alone with glory, enthusiasm (Mary Cantwell, Dining Alone), a sense of self-declaration, independence, defiance (Jami Attenberg, Protective Measures), most often for a lady at a restaurant, and usually in the first days of eating alone. There’s eating alone to observe (Colin Harrison, Out to Lunch), to indulge (Anneli Rufus, White-on-White Lunch for When No One is Looking), to be relentlessly particular about your food and give no room for compromise (Erin Ergenbright, Table for One). These things happen when one has been eating alone for a long time, and accept it.

There’s happy eating alone because of a desperate need to escape the everyday hustle (Holly Hughes, Luxury), the joy is temporary like fireworks. There’s sad eating alone with a boiling thirst for companions (Laura Calder, The Lonely Palate). Then there’s the mellow eating alone because of permanent solitude, and although feeling lonely to the bones, in some way the lone diner religiously ties himself to that loneliness as if he couldn’t live without it, his repetitive meal is his only and last company. “What does an introvert do when he’s left alone? He stays alone.” (Jeremy Jackson, Beans and Me)

The person with whom I dine the most, me, has taken all of these forms. I found that amusing and sad, but to make things worse, I saw my friend in Haruki Murakami’s The Year of Spaghetti, “[tossing one handful of spaghetti after another into the pot] like a lonely, jilted girl throwing old love letters into the fireplace”. Eating alone is like dressing yourself when you’re invisible, you know you should make it good, but you wonder if it’s worth the hassle. Is that why the masked superheroes never change their outfit?

I noticed my onion doesn’t like direct sunlight, and it needed more soil, so today I went to a garden store begging for a plastic bag of soil. (I thought about digging up a cup from the neighborhood at night, but that wouldn’t sit right.) On the bus, I sat across from a boy, 12 years old he said, just far enough that he didn’t notice me watching him eat and close enough to see that it was gomiti in a loose broth with bits of carrots and green bellpeppers. Then I realized the book forgot one kind of eating alone: eating alone among a lot of people who aren’t eating. What do you feel then?


Garlic Scrambled Eggs over Rice (serves one for 3 meals)
– 4 cups rice
– 8 eggs
– 1/2 clove garlic, thinly sliced
– 1 tsp salt
– 2 tbs sugar
– 1 tsp oil

Cook rice. Oil the pan. Brown the garlic(*). Break and scramble the eggs. Add sugar and salt. Serve on or mix with rice.

(*) I used to add onion too, until Onion sprouted into a friend.